
あけましておめでとうございます。SCSK渡辺(大)です。
今回は、AWS Amplify+AWS CDKで人生初のアプリケーションを作ってみました。
車のハザードランプのマークがAWS Amplifyのロゴに見えてきてしまうくらいには触りました。
3回に分けて掲載予定です。
- 第1回:AWS Amplifyでデプロイした後にログイン画面をカスタマイズしてみた ←今回
- 第2回:AWS CDKでAPIを作ってみた
- 第3回:アプリケーションを構築して動かしてみた
準備
React+Viteをインストールする
React+Viteをインストールします。
- React:UI構築用のJavaScriptライブラリ。流行っている。
- Vite:ビルドツール。高速で動作する。
- TypeScript:プログラミング言語。型安全で可読性と保守性が高い。コンパイルするとJavaScriptになる。
- SWC:コンパイルとバンドルを高速に行えるツール。
$ npm create vite@latest

> npx
> create-vite

√ Project name: ... test
√ Select a framework: » React
√ Select a variant: » TypeScript + SWC

Scaffolding project in C:\Users\xxxxx\Desktop\VSCODE\test...

Done. Now run:

cd temp
npm install
npm run dev
出力されている通りのコマンドを打ちます。
$ cd test

#testディレクトリに移動。

$ npm install

added 142 packages, and audited 143 packages in 1m

40 packages are looking for funding
run `npm fund` for details

found 0 vulnerabilities

$ npm run dev

> test@0.0.0 dev
> vite


VITE v6.0.7 ready in 644 ms

➜ Local: http://localhost:5173/
➜ Network: use --host to expose
➜ press h + enter to show help
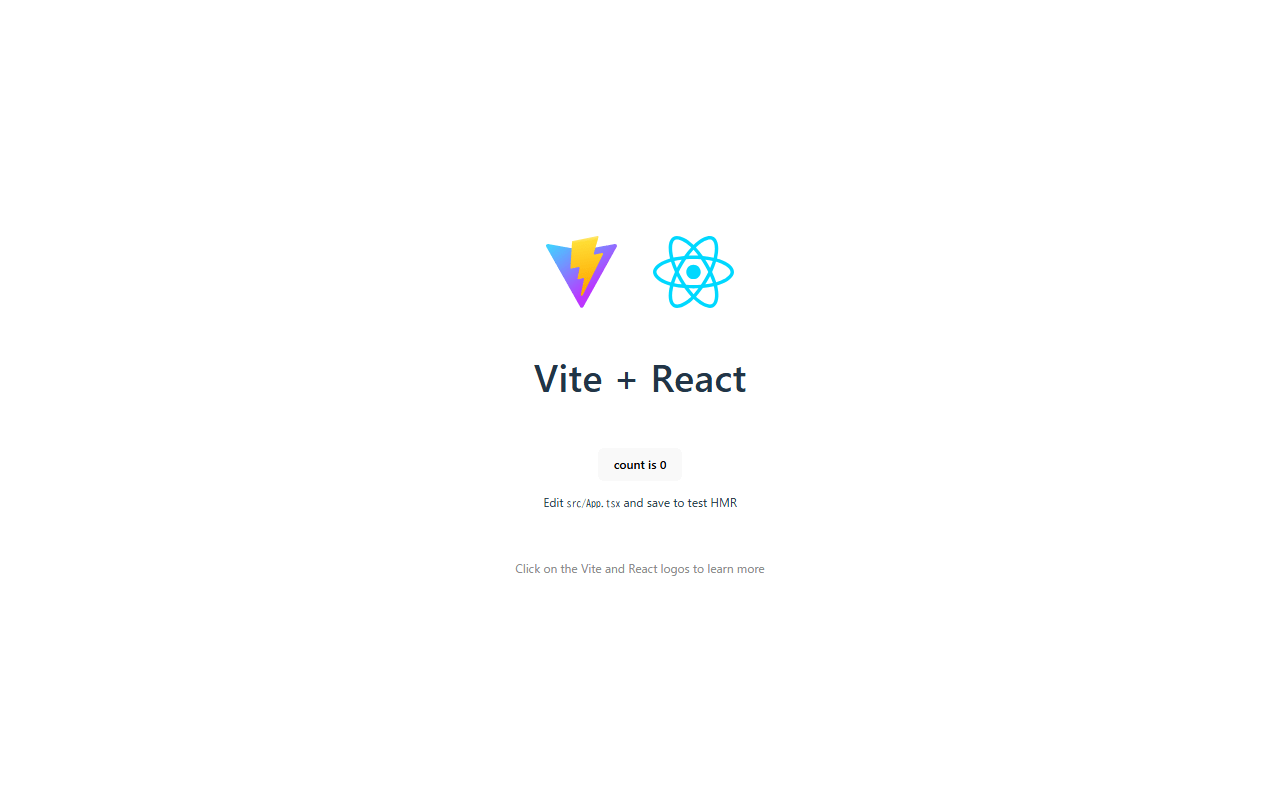
ローカル環境(➜ Local: http://localhost:5173/)のリンクをクリックし、以下の画面が表示されることを確認します。
AWS Amplifyをインストールする
AWS Amplifyをインストールします。
$ npm create amplify@latest
Need to install the following packages:
create-amplify@1.0.7
Ok to proceed? (y) y


> test@0.0.0 npx
> create-amplify

? Where should we create your project? .

Installing devDependencies:
- @aws-amplify/backend
- @aws-amplify/backend-cli
- aws-cdk@^2
- aws-cdk-lib@^2
- constructs@^10.0.0
- typescript@^5.0.0
- tsx
- esbuild

Installing dependencies:
- aws-amplify

✔ DevDependencies installed
✔ Dependencies installed
✔ Template files created
Successfully created a new project!

Welcome to AWS Amplify!
- Get started by running npx ampx sandbox.
- Run npx ampx help for a list of available commands.

Amplify collects anonymous telemetry data about general usage of the CLI. Participation is optional, and you may opt-out by using npx ampx configure telemetry disable. To learn more about telemetry, visit https://docs.amplify.aws/react/reference/telemetry
リモートリポジトリにpushする
ローカルリポジトリをリモートリポジトリに反映します。
$ git init
$ git add .
$ git commit -m "first commit"
$ git branch -M main
$ git remote add origin https://xxxxxxxxxxxxxx/test.git
$ git push -u origin main
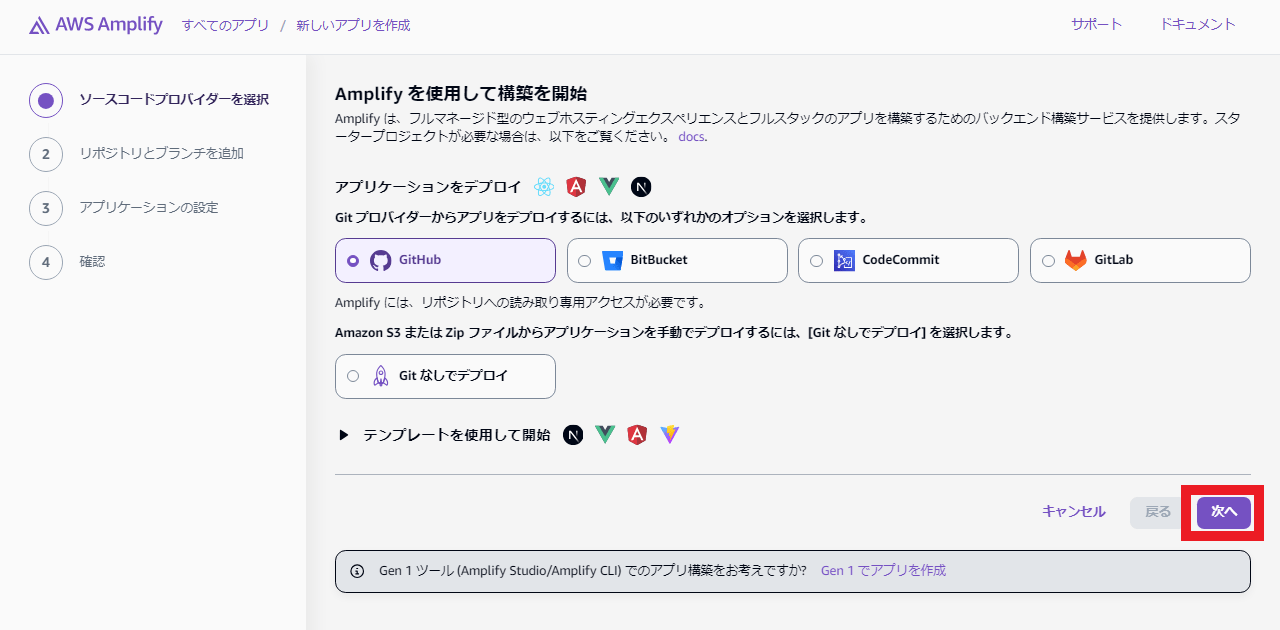
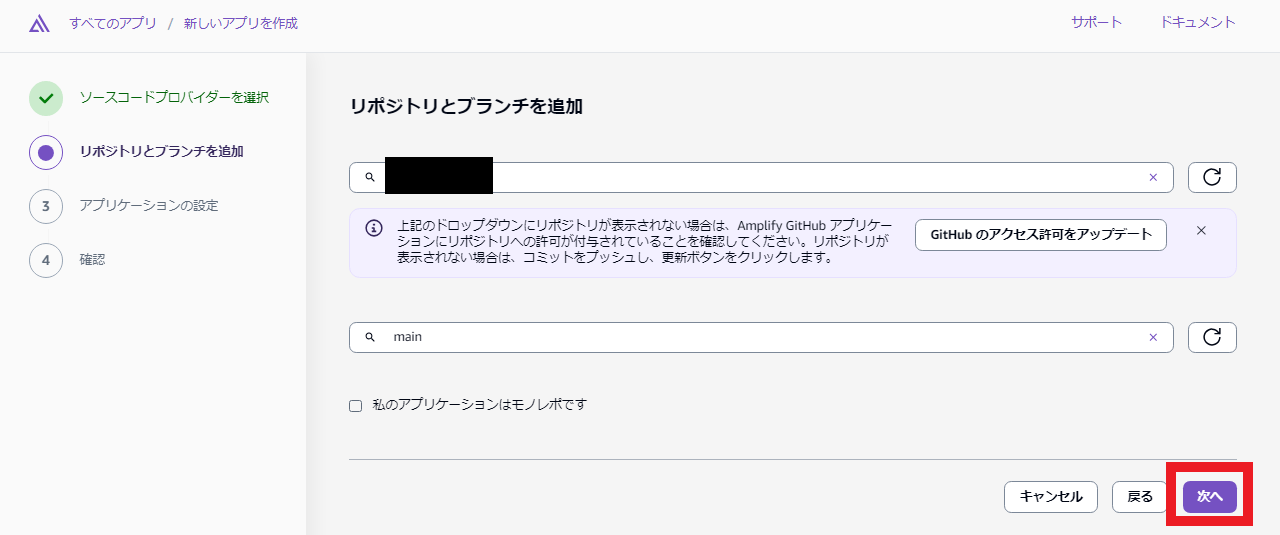
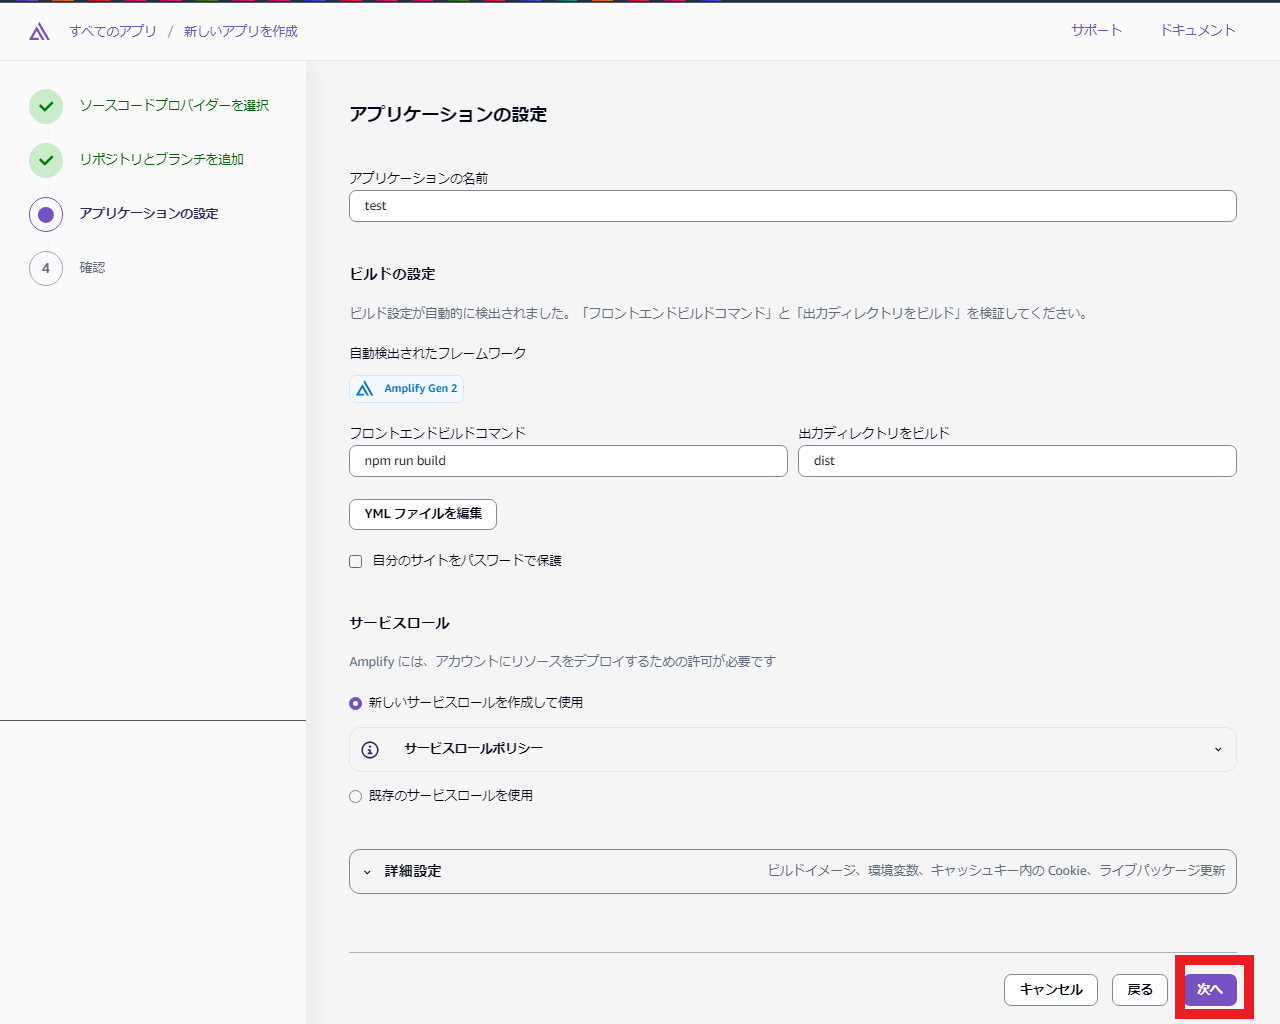
AWS Amplifyにデプロイする
デプロイはとても簡単です。
リモートリポジトリを選択して数回クリックするだけです。

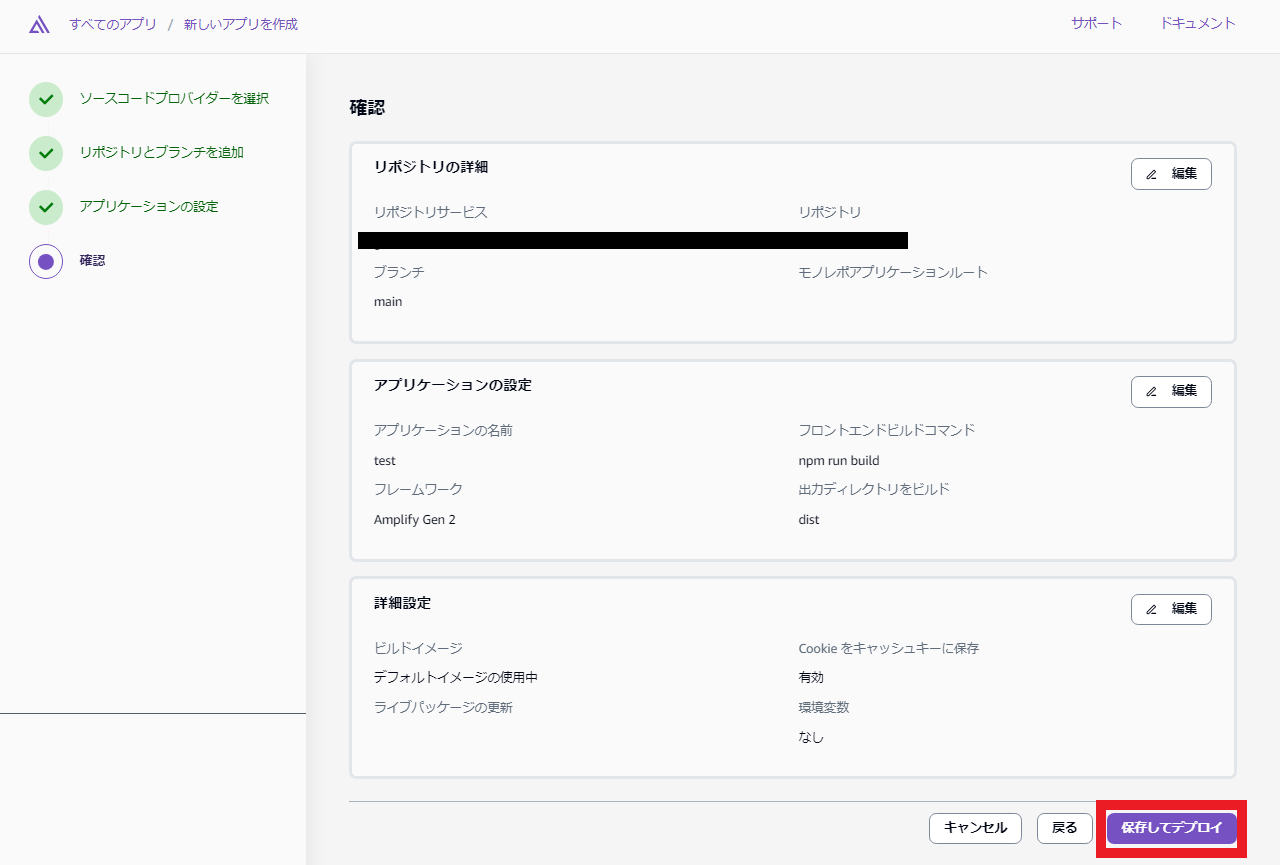
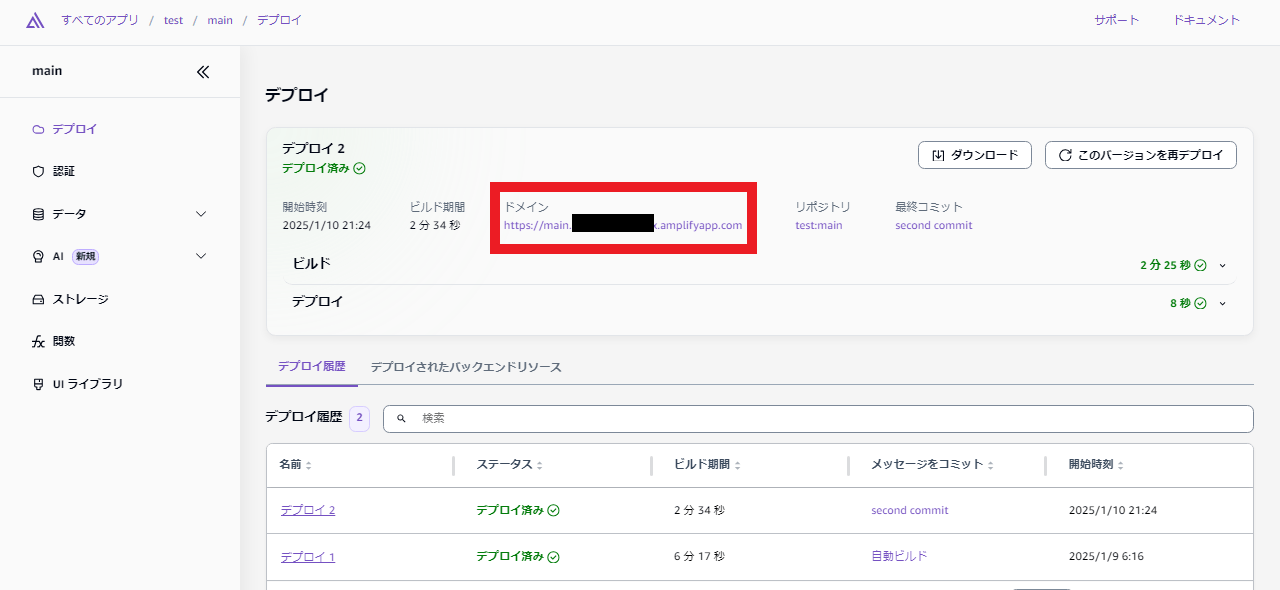
デプロイが開始されると以下の画面に切り替わります。

デプロイが完了したのでアプリを開いてみます。

ローカル環境で確認したものと同じ画面が表示されました。
URLも本番環境のものであることが確認できました。

ログイン画面をカスタマイズする
ライブラリのインストール
ログイン画面で使用するライブラリをインストールします。
$ npm install -g @aws-amplify/cli@latest
npm warn deprecated inflight@1.0.6: This module is not supported, and leaks memory. Do not use it. Check out lru-cache if you want a good and tested way to coalesce async requests by a key value, which is much more comprehensive and powerful.
npm warn deprecated rimraf@3.0.2: Rimraf versions prior to v4 are no longer supported
npm warn deprecated glob@7.2.3: Glob versions prior to v9 are no longer supported

added 33 packages in 10s

7 packages are looking for funding
run `npm fund` for details

$ npm install @aws-amplify/ui-react aws-amplify

added 61 packages, and audited 1959 packages in 1m

197 packages are looking for funding
run `npm fund` for details

found 0 vulnerabilities
ついでにページ遷移に便利なReact Routerフックをインストールします。
$ npm install react-router-dom

up to date, audited 1965 packages in 28s

197 packages are looking for funding
run `npm fund` for details

found 0 vulnerabilities
Amazon Cognitoと連携する
AWS CognitoのユーザープールIDとユーザープールクライアントIDを確認します。
マネジメントコンソールから確認しに行っても良いのですが、amplify_outputs.jsonで確認することも可能です。
amplify_outputs.jsonはデプロイの画面からダウンロードできます。
amplify_outputs.jsonは大事に保管するか、参照後はローカル環境から削除しておきましょう。

{
  "auth": {
    "user_pool_id": "[ユーザープールID]",
    "aws_region": "ap-northeast-1",
    "user_pool_client_id": "[ユーザープールクライアントID]",
ルートディレクトリに.envファイルを作成し環境変数を定義します。
VITE_REACT_APP_USER_POOL_ID=[ユーザープールID]
VITE_REACT_APP_USER_POOL_CLIENT_ID=[ユーザープールクライアントID]
ログイン画面を作成する
プロジェクトの中にあるsrcディレクトリの下に、pagesディレクトリを作り、その中にLogin.tsxファイルを作ります。
そのファイルに以下のように記述します。
import { Authenticator, translations } from "@aws-amplify/ui-react";
import "@aws-amplify/ui-react/styles.css";
import '../App.css'
import Page1 from '../App.tsx'
import { I18n } from "aws-amplify/utils"
import { Amplify } from "aws-amplify";
import { ResourcesConfig } from "@aws-amplify/core";
import { BrowserRouter, Routes, Route } from 'react-router-dom';
const userPoolClientId = import.meta.env.VITE_REACT_APP_USER_POOL_CLIENT_ID;
const userPoolId = import.meta.env.VITE_REACT_APP_USER_POOL_ID;
const awsConfig: ResourcesConfig = {
  Auth: {
    Cognito: {
      userPoolClientId: userPoolClientId,
      userPoolId: userPoolId,
    },
  },
};
Amplify.configure(awsConfig);

function Login() {
  return (
    <BrowserRouter>
      <Authenticator>
        {({ user }) => (
          <main>
            {user && (
              <Routes>
                <Route path="/" element={<Page1 />} />
              </Routes>
            )}
          </main>
        )}
      </Authenticator>
    </BrowserRouter>
  );
}

I18n.putVocabularies(translations)
I18n.setLanguage("ja")

export default Login;
解説します。(一部重複コードあります)
以下でログイン画面を作っています。
import { Authenticator, translations } from "@aws-amplify/ui-react";
import "@aws-amplify/ui-react/styles.css";
function Login() {
  return (
      <Authenticator>
        {({ user }) => (
          <main>
            {user && (
            )}
          </main>
        )}
      </Authenticator>
  );
}
export default Login;
以下で日本語化させてます。
import { Authenticator, translations } from "@aws-amplify/ui-react";
import { I18n } from "aws-amplify/utils"
I18n.putVocabularies(translations)
I18n.setLanguage("ja")
以下で見た目を制御しています。
import "@aws-amplify/ui-react/styles.css";
import '../App.css'
以下でページ遷移を制御しています。
import Page1 from '../App.tsx'
import { BrowserRouter, Routes, Route } from 'react-router-dom';
    <BrowserRouter>
              <Routes>
                <Route path="/" element={<Page1 />} />
              </Routes>
    </BrowserRouter>
以下でAmazon Cognitoと連携をしています。
import { Amplify } from "aws-amplify";
import { ResourcesConfig } from "@aws-amplify/core";
const userPoolClientId = import.meta.env.VITE_REACT_APP_USER_POOL_CLIENT_ID;
const userPoolId = import.meta.env.VITE_REACT_APP_USER_POOL_ID;
const awsConfig: ResourcesConfig = {
  Auth: {
    Cognito: {
      userPoolClientId: userPoolClientId,
      userPoolId: userPoolId,
    },
  },
};
Amplify.configure(awsConfig);
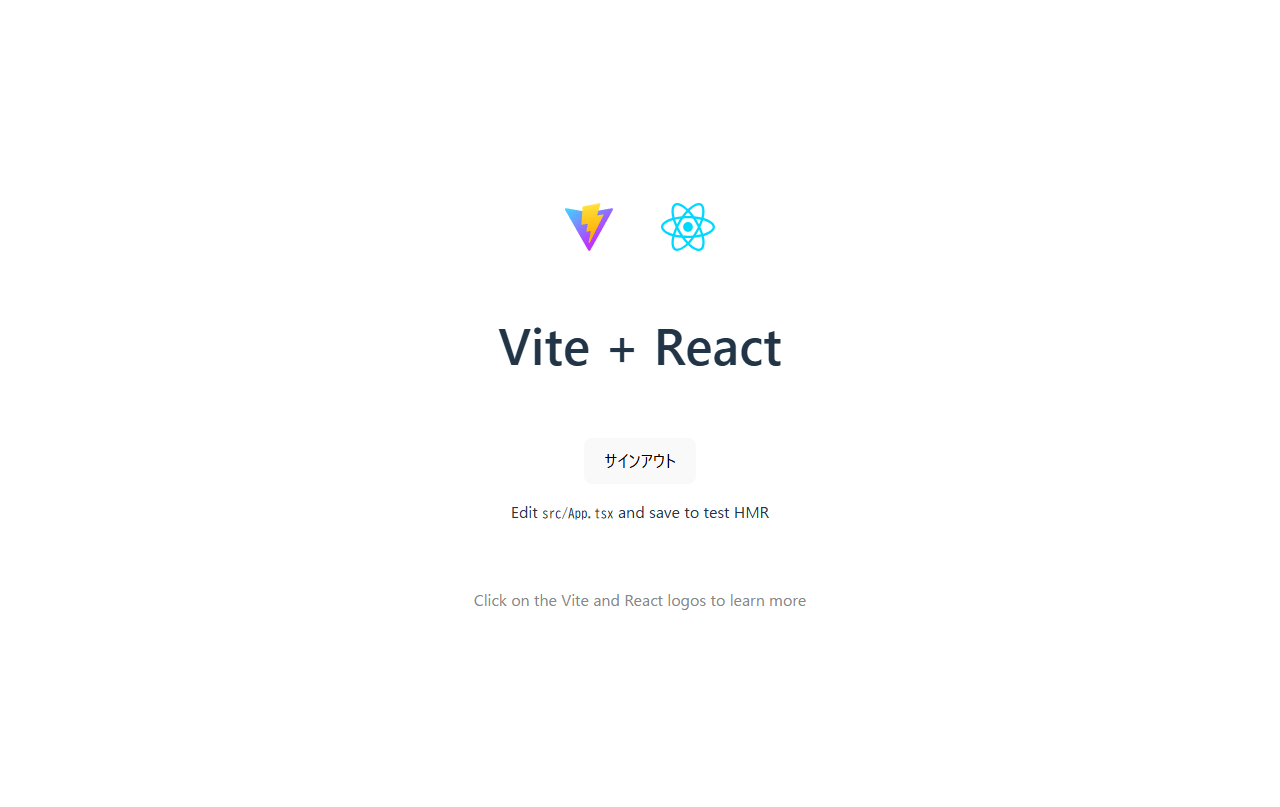
ログイン後の画面(デフォルト画面)にサインアウトのボタンを配置する
import reactLogo from './assets/react.svg'
import viteLogo from '/vite.svg'
import './App.css'
import { Authenticator } from "@aws-amplify/ui-react";
function App() {
  return (
    <Authenticator>
      {({ signOut }) => (
        <>
          <div>
            <a href="https://vite.dev" target="_blank">
              <img src={viteLogo} className="logo" alt="Vite logo" />
            </a>
            <a href="https://react.dev" target="_blank">
              <img src={reactLogo} className="logo react" alt="React logo" />
            </a>
          </div>
          <h1>Vite + React</h1>
          <div className="card">
            <button onClick={signOut}>サインアウト</button>
            <p>
              Edit <code>src/App.tsx</code> and save to test HMR
            </p>
          </div>
          <p className="read-the-docs">
            Click on the Vite and React logos to learn more
          </p>
        </>
      )}
    </Authenticator>
  )
}
export default App
import { Authenticator } from "@aws-amplify/ui-react";
  <Authenticator>
    {({ signOut }) => (
          <button onClick={signOut}>サインアウト</button>
  </Authenticator>
アクセス時にログイン画面が表示されるようにする
main.tsxを以下のように修正します。
import { StrictMode } from 'react'
import { createRoot } from 'react-dom/client'
import './index.css'
import Login from '../src/pages/Login.tsx'
createRoot(document.getElementById('root')!).render(
  <StrictMode>
    <Login />
  </StrictMode>,
)
リモートリポジトリにpushする
ローカルリポジトリをリモートリポジトリに反映します。
$ git add .
$ git commit -m "second commit"
$ git push -u origin main
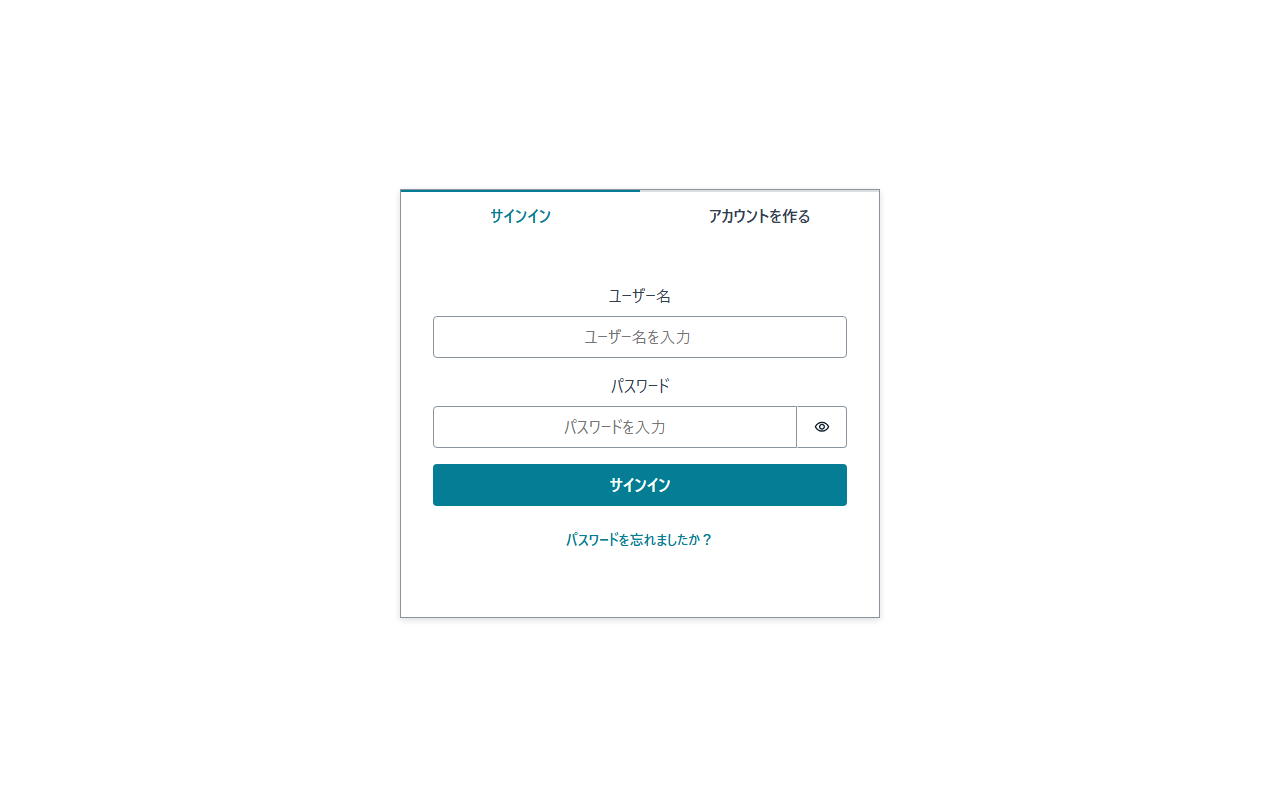
自動でデプロイされましたので改めて見てみます。
ログイン画面が出ました。
アカウントを作るとAmazon Cognitoにユーザーが作成されました。


作成したユーザーでログインできました。
画像では伝わりませんが、サインアウトも問題なくできました。
まとめ
アプリ初心者がいきなりAWS Amplifyを触るのは邪道だったかもしれませんが、先輩方の記事を眺めていると将来的にはAWS Amplifyを触れるようになっておいたほうが良いのかと感じたため、今回の記事執筆に至りました。
アプリ開発したことがなかったので、完全にゼロの状態から調べながら進めました。
時間が掛かった反面、とても勉強になりました。